
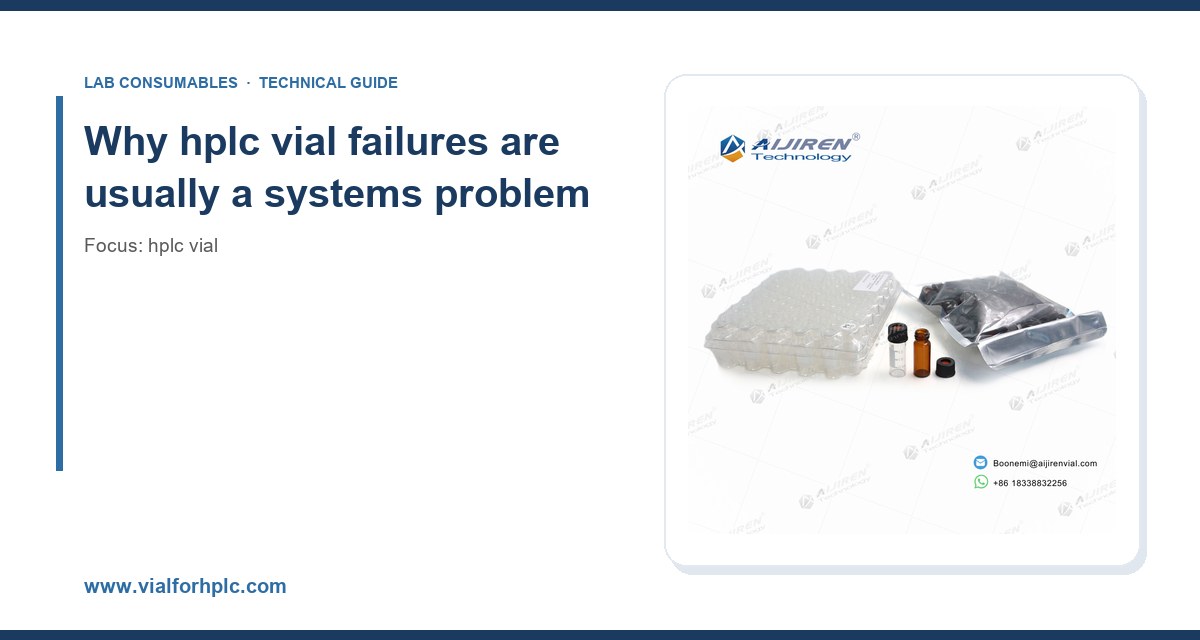
I have watched a lot of good chromatography go bad because of a 32 x 11.6 mm piece of glass. After fifteen years running a consumables operation, I keep a running list of the vial failures that show up in customer labs week after week. Most of them are not mystery problems. They are predictable, repeatable, and traceable to a handful of root causes: the wrong septa, the wrong crimp, the wrong cap torque, or a vial that was never designed for the autosampler it sits in. This article is the field guide I wish every new analyst got on day one.
We sell a lot of vials through Hplc Vial, and the returns and complaints we see cluster tightly around the same failure modes. Fix those and your repeat injections tighten, your needle life goes up, and your blank runs stop looking like a toxicology screen. Here is what actually goes wrong and how to stop it.
A vial is not a standalone part. It is a closure system made of glass, septum, and cap, and that system has to survive contact with an autosampler needle, a heated tray, a solvent gradient, and a sample matrix that may be acidic, basic, or full of protein. When one element is out of spec, the failure shows up somewhere else. A soft septum sheds cores that plug a needle. A loose crimp lets solvent evaporate and concentrates your sample. A vial with the wrong bottom geometry leaves 40 microliters behind that your method never accounted for.
The practical consequence: when an injection goes wrong, do not blame the column first. I have seen analysts swap three columns before someone noticed the septum was half-seated. The Chromatography Consumables supply chain matters here because a mixed box of caps from two suppliers is a recipe for inconsistent penetration depth.
Failure mode 1: septum coring and needle damage
What it looks like
You see small rubber fragments in the sample, a partially blocked needle, or a sudden rise in back pressure at the needle seat. On a UV trace it can look like ghost peaks that appear at random retention times. On an autosampler with a needle seat sensor, it shows up as a failed injection or a “needle not seated” error that clears itself after a rinse.
Root cause
Coring happens when the needle punches through a septum that is too hard, too thick, or pre-punctured in a different spot than the current needle path. A standard 11 mm septum in a 40 Shore A silicone/PTFE sandwich is designed for roughly a few hundred punctures at the same point before the slit starts to tear. If your autosampler has a fixed needle path and you re-use the same vial position, all those punctures land in the same place.
Two other contributors matter more than people think. First, a dull or bent needle. A needle that has taken 5,000 injections develops a burr that cuts rather than pierces. Second, a septum that is not fully seated in the cap. A partially pressed septum sits proud of the cap and the needle punches at an angle, which tears a crescent instead of a clean slit.
How to prevent it
- Match septum hardness to your needle. For 22 gauge needles on standard autosamplers, a 40 to 45 Shore A silicone with a PTFE face is the workhorse. For 26 gauge or fused-silica needles, go softer, around 35 Shore A, to reduce insertion force.
- Use pre-slit septa only when your method and autosampler tolerate them. Pre-slit caps reduce coring but can increase evaporation on long runs at room temperature.
- Replace vial caps on a schedule, not on a hunch. For a 24-hour run with a fixed needle path, I treat 100 punctures per position as the practical ceiling for a standard septum. Beyond that, coring risk climbs fast.
- Inspect needles weekly under a loupe. A burr you cannot see with the naked eye will core a septum in a dozen injections.
Failure mode 2: evaporation and sample concentration
What it looks like
Peak areas drift upward across a long sequence. Calibration standards injected at hour zero and hour eight disagree by 5 to 15 percent. The effect is worst for volatile analytes, small fill volumes, and vials left in a tray at ambient temperature.
Root cause
Incomplete crimping or a loose screw cap leaves a micro-gap at the cap-to-glass interface. Methanol and acetonitrile cross a PTFE face slowly even when the seal is good, but a bad seal turns slow permeation into outright loss. The math is unforgiving: a 1.5 mL fill in a 2 mL vial that loses 20 microliters of solvent per hour has concentrated by more than 1 percent in a single hour.
How to prevent it
- Crimp with a calibrated tool. For a standard 11 mm aluminum crimp, target a crimp diameter of about 10.5 mm and check it with a go/no-go gauge. A crimp that is too loose leaks; one that is too tight cracks the neck or deforms the septum.
- For screw caps, torque to the manufacturer’s spec. A typical 9 mm screw thread with a silicone/PTFE liner seals reliably at hand-tight plus a quarter turn. Over-torquing extrudes the liner and creates a leak path at the cap edge.
- Cap vials immediately after filling. I have seen a 30-minute bench delay cost more in evaporation than a whole run.
- Use a chilled autosampler tray for volatile analytes. A tray held at 4 to 10 degrees C cuts headspace loss dramatically.
Failure mode 3: autosampler incompatibility and needle crashes
What it looks like
The autosampler faults out, the needle bends, or the vial gets pushed out of the tray. Sometimes the run completes but the reported injection volume is wrong because the needle never reached the liquid.
Root cause
Vial dimensions are standardized but not identical across formats. The common 12 x 32 mm short vial and the 12 x 32 mm with a 9 mm screw thread share a footprint, but the neck height, the cap crown, and the bottom geometry vary. A vial with a thick glass base or a rounded interior bottom can leave the needle above the liquid at low fill volumes. A cap with a tall crown can foul the gripper on some autosamplers.
This is where the Lab Vials catalog earns its keep. If you run several autosampler models, standardize on one vial geometry that is documented to fit all of them, and keep the datasheet on file. I have watched a lab lose a full day because a substitute vial had a 1 mm taller neck and the gripper kept dropping it.
How to prevent it
- Confirm the vial is listed for your autosampler model, not just the “12 x 32” size class. Neck height and crown diameter are the specs that bite.
- Match bottom geometry to fill volume. For fills under 150 microliters, use a conical or pulled-point insert. A flat-bottom vial at that volume leaves the needle dry.
- Check the needle depth setting against the actual vial. A 1 mm error at the bottom is enough to miss a 100 microliter fill.
- Run a fit test with a full tray before committing a method. Ten minutes of testing beats an overnight run that faults at hour six.
Failure mode 4: adsorption and carryover on the glass
What it looks like
Low-concentration analytes vanish. A 1 ng/mL standard reads low or disappears entirely, while the 100 ng/mL standard is fine. Carryover shows up as a small peak in the blank after a high standard.
Root cause
Borosilicate glass has silanol groups on its surface that adsorb basic compounds and some polar analytes. The effect is worst at low concentrations where the surface area of the vial competes with the analyte in solution. A dirty vial, a vial washed in a detergent that leaves residue, or a vial with a scratched interior all make it worse. Carryover is the flip side: analyte sticks to the glass during one injection and desorbs into the next.
How to prevent it
- Use vials certified for low adsorption when you work below 10 ng/mL. Deactivated glass or a silanized interior reduces silanol activity.
- Never re-use vials for trace analysis. A vial that held a high standard is a carryover source no rinse fully removes.
- For basic analytes, consider adding a small amount of formic acid or a buffered diluent to keep the analyte from interacting with the glass.
- Run a carryover check: inject a blank after your highest standard and require the blank peak to be under 0.1 percent of the high standard area.
Failure mode 5: contamination from the vial itself
What it looks like
Extra peaks appear in every injection, including blanks. Phthalate peaks at m/z 149 in GC-MS are the classic tell. In LC-UV you see a rising baseline or a peak that follows the solvent front.
Root cause
Plasticizers from caps and septa, mold release agents from manufacturing, or detergent residue from lab washing. A silicone septum with a poor PTFE face can leach into the solvent. A vial washed in a dishwasher and dried in a drying oven picks up whatever was in the oven.
How to prevent it
- Buy vials and caps certified for the technique. For LC-MS, demand a certificate showing low extractables. For GC-MS, ask for the phthalate test result.
- Do not wash and re-use vials for trace work. If you must re-use, wash with HPLC-grade solvent and dry in a clean oven dedicated to glassware.
- Run a solvent blank through a full vial set before a critical sequence. If the blank is dirty, the vials are the problem, not the instrument.
- Store caps in their original bag. An open bag of septa on a bench absorbs everything in the room.
Failure mode 6: crimp and cap seal failures
What it looks like
The cap spins freely, the septum is distorted, or the vial leaks when inverted. On a heated tray, the leak gets worse.
Root cause
Wrong crimp height, a worn crimping jaw, or a mismatched cap and vial neck. An aluminum crimp that is too tall does not compress the septum; one that is too short cracks the neck. A plastic screw cap with a liner that is too thin does not seal against a neck with a molding seam.
How to prevent it
- Service the crimper. Jaws wear. A crimper that has sealed 50,000 vials is due for a check against a go/no-go gauge.
- Match cap and vial from the same supplier and lot. Cross-supplier mixing is where seal failures come from.
- Test the seal by inverting a filled vial for 30 seconds. Any weep means the crimp or cap is wrong.
- For heated trays above 40 degrees C, use a cap rated for the temperature. Standard silicone is fine to about 200 degrees C as a material, but the seal geometry and the liner bond are what fail first.
Failure mode 7: light and temperature degradation
What it looks like
Peak areas fall over a long run for light-sensitive analytes. Vitamins, some pesticides, and many pharmaceuticals degrade in clear glass under lab lighting.
Root cause
Clear borosilicate transmits UV and visible light. A vial sitting on a tray under fluorescent lights for six hours is being irradiated the whole time. Heat from a tray heater adds to the problem for thermally labile compounds.
How to prevent it
- Use amber vials for light-sensitive analytes. Amber glass blocks most of the damaging range below 500 nm.
- Keep the autosampler tray covered and the lab lights off the sample path where possible.
- For thermally labile compounds, hold the tray at 4 to 10 degrees C and shorten the run where you can.
A field troubleshooting checklist
When an injection goes wrong, work through this in order. It saves time and it isolates the cause instead of guessing.
- Symptom: ghost peaks in every injection. Check the solvent blank first, then the vial set. Run a fresh vial from a sealed bag. If the peaks disappear, the vial or cap is the source.
- Symptom: peak areas drifting up. Weigh a filled vial before and after the run. A loss over 10 milligrams on a 1.5 mL fill points to evaporation and a bad seal.
- Symptom: needle faults or bent needles. Inspect the septum for coring, check needle depth, and confirm the vial is listed for the autosampler.
- Symptom: low response at trace levels. Switch to a low-adsorption vial and run a carryover check. Require the blank to be under 0.1 percent of the high standard.
- Symptom: seal leaks. Invert the vial for 30 seconds. Check crimp diameter with a gauge. Target about 10.5 mm for an 11 mm crimp.
- Symptom: degradation over a long run. Move to amber glass and a chilled tray. Check the analyte’s known light and temperature sensitivity.
Comparison: choosing the right vial for the job
Here is the decision table I use when a lab asks which vial to standardize on. The numbers are the ones that actually decide the outcome.
- Routine LC-UV, fills above 500 microliters, ambient tray: 12 x 32 mm clear borosilicate, 9 mm screw cap, silicone/PTFE septum at 40 to 45 Shore A. Cheapest reliable option. Replace caps after about 100 punctures.
- LC-MS at trace levels, fills under 500 microliters: low-adsorption deactivated glass, 9 mm screw cap with a certified low-extractable septum. Expect to pay more per vial; the recovery is worth it.
- GC-MS, volatile analytes: 11 mm crimp, PTFE-faced silicone septum, calibrated crimper. Verify the phthalate test result before you buy.
- Light-sensitive analytes: amber glass, same closure as above. Do not rely on a lab curtain alone.
- Small fills under 150 microliters: conical insert or pulled-point vial. A flat bottom will leave the needle dry.
- Heated trays above 40 degrees C: cap and septum rated for the temperature, and a seal test before the run.
For cross-checking against instrument maker guidance, the Agilent chromatography consumables and columns documentation and the Thermo Fisher chromatography and sample handling resources both publish autosampler-specific vial fit notes. The Restek technical resources for chromatography library has good material on septum selection and carryover. For regulated work, the U.S. EPA SW-846 test methods for waste and materials set the sample handling expectations that many labs have to meet.
What I recommend you standardize on
Pick one vial geometry, one cap, and one septum per technique, and document the specs. For most labs running routine LC, that means a 12 x 32 mm clear borosilicate vial with a 9 mm screw thread, a silicone/PTFE septum at 40 to 45 Shore A, and a cap torque of hand-tight plus a quarter turn. For crimp users, an 11 mm aluminum seal at about 10.5 mm crimp diameter with a calibrated tool. For trace work, move to a low-adsorption vial and a certified low-extractable septum, and accept the higher unit cost.
Brand consistency matters more than most people admit. I have seen labs chase a ghost peak for a week only to find that a substitute cap from a different supplier had a slightly different liner. The Aijiren Brand line is one we stock because the lot-to-lot dimensions hold, and that is the property that keeps a method stable. Whatever you choose, keep the certificate of analysis on file and re-qualify when the supplier changes a molding or a liner.
Takeaway
Most hplc vial failures are not random. They come from a small set of causes: the wrong septum hardness for the needle, a loose crimp or cap, a vial that does not fit the autosampler, adsorption at trace levels, contamination from the closure, and light or heat degradation on a long run. Fix the closure system as a system, standardize on one geometry per technique, replace caps on a puncture schedule, and run a blank through every new vial lot. Do that and the vial stops being the variable in your method. The instrument, the column, and the sample get to be the things you troubleshoot, which is where your time belongs.
References & further reading
Related resources from our lab consumables network:
- Hplc Vial at vialforhplc.com
- Chromatography Consumables at chromatographyconsumables.com
- Lab Vials at labvials.com
- Aijiren Brand at aijirenvials.com
External references and standards: