
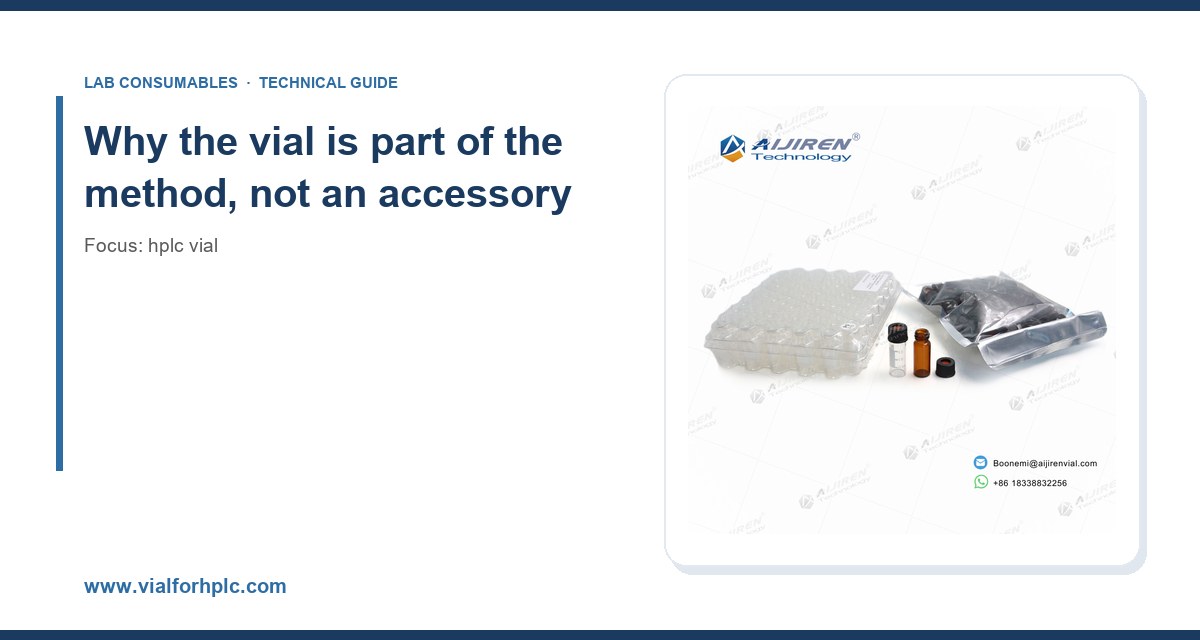
I have specified, bought, and rejected more HPLC vials than I care to count. The one that finally taught me the lesson was a 2 mL clear glass vial with a thin crimp neck that looked perfect on the quote sheet and then shed a glass particle into the autosampler needle on the third injection of a 96-well run. We lost a day, an analyst’s patience, and a client sample we could not re-collect. Since then I treat vial selection as an engineering decision, not a catalog pick. This guide is what I hand to new buyers and to lab managers who keep asking why the same method works in one lab and fails in another.
The vial is the last vessel your sample touches before the column, and the first place where evaporation, adsorption, and particle shedding can change the result. A 2 mL vial with a nominal 12 x 32 mm body holds roughly 1.5 mL of usable liquid once you leave headspace for the autosampler needle. That headspace is not dead volume. It is a reservoir for solvent vapor, and its size and seal quality decide how much your concentration drifts between the first and last injection of a sequence.
I have watched a 4-hour sequence of volatile analytes lose 6 to 9 percent of peak area from injection 1 to injection 60 in vials with poor septa, and hold within 1.5 percent RSD when we switched to a properly seated silicone/PTFE septum with a crimp that actually compressed. The chemistry did not change. The container did.
That is the frame for everything below. You are not buying glass. You are buying a defined volume, a defined seal, a defined inertness, and a defined mechanical fit with a specific autosampler. Get any of those wrong and the data suffers before the column ever sees the sample.
The four vial formats you will actually be choosing between
Most HPLC workflows land in one of four formats. Know which one your autosampler was designed around before you shop, because the tray geometry and needle stroke are fixed by the instrument, not by your preference.
Standard 2 mL vial (12 x 32 mm)
The workhorse. Fits almost every autosampler tray from Agilent, Waters, Shimadzu, and Thermo. Comes in clear glass, amber glass for light-sensitive analytes, and in two neck styles: crimp and screw thread. Usable volume around 1.5 mL. This is where most buyers should start and where most should stay unless they have a specific reason to move.
Wide-mouth 2 mL vial (12 x 32 mm, 9 mm opening vs 6 mm)
Same footprint, wider 9 mm opening. The wider mouth matters when you are pipetting viscous samples, working with slurries, or using an autosampler needle that approaches off-center. The trade-off is a larger septum area and slightly more headspace exposure. For high-throughput labs running robotic liquid handlers, the wide mouth reduces pipetting errors noticeably. I standardize on wide-mouth for anything with a protein or a suspension in it.
Microvials and inserts
When sample volume is the constraint (precious analyte, limited plasma, expensive standard), you drop a 150 µL or 250 µL glass insert into a standard 2 mL vial, or move to a true microvial with a 300 µL body. Inserts come with or without a polymer feet; the feet version centers itself and pulls the last microliters to the needle. The failure mode here is the insert tipping during transport and the needle striking glass. If you use inserts, use a spring-loaded or feet-bottomed design and verify the needle depth against the insert bottom with a dummy run.
Amber and silanized variants
Amber glass blocks wavelengths below about 500 nm and is the default for light-sensitive compounds (vitamins, some antibiotics, many natural products). Silanized (deactivated) glass is for analytes that adsorb to bare borosilicate: proteins, peptides, amines, and some basic drugs. Deactivation is not free and not permanent. It buys you a defined low-adsorption surface for a defined period, and you should treat it as a consumable with a shelf life, not a permanent property.
Glass grade, and why “clear glass” is not a specification
Two vials can both say “borosilicate” and behave differently. What you actually want to know is the hydrolytic class and the extractables profile.
- Type I borosilicate (USP <660>) is the standard for HPLC. Low alkali release, low extractables, good pH resistance. This is what you should be buying for anything aqueous or acidic.
- Type II (soda-lime with a surface treatment) is cheaper and fine for some non-critical work, but I would not put a pH 2 mobile-phase-matched sample in it for a 24-hour run.
- Type III soda-lime is for general storage, not for analytical injection. Skip it.
Ask your supplier for the hydrolytic class in writing. If they cannot state it, that tells you something. For regulated work, the vial is part of the sample container and falls under the same extractables thinking you apply to filters and tubing. The U.S. EPA’s SW-846 test methods are a useful reminder that container and preservation choices are method-defined, not optional, and the same discipline applies to your vial selection.
Septa: the part that quietly ruins your data
If I could change one purchasing habit across the industry, it would be to stop treating septa as a commodity line item. The septum is where evaporation, coring, and extractables happen.
Silicone/PTFE sandwich
The default for HPLC. A silicone core gives resealability and needle compliance; the PTFE face on the sample side gives chemical inertness. The PTFE must face the sample. I have seen this installed backwards more than once, and the result is silicone extractables bleeding into the chromatogram as a drifting baseline and ghost peaks.
Puncture counts and resealability
A good silicone/PTFE septum tolerates roughly 3 to 10 punctures before the reseal degrades enough to allow measurable evaporation, depending on needle gauge and septum thickness. Pre-slit septa are designed for single-use, high-throughput runs and trade resealability for reduced coring. If your method injects the same vial more than three times, plan the septum accordingly, or use a fresh vial for the standard curve and the samples separately.
Coring
Coring is when the needle punches a plug of septum into the vial. It shows up as a particle on the chromatogram, a blocked needle, or an intermittent autosampler error. It is almost always a needle/septum mismatch: a large-bore or blunt needle against a thin septum. Match needle gauge to septum thickness and use a septum rated for your needle. Restek’s technical resources are a good place to check compatibility tables before you commit to a lot.
Caps, crimping, and torque: the numbers that matter
The cap is the mechanical interface. Get it wrong and the seal leaks, the vial sits too high in the tray, or the autosampler gripper drops it.
Crimp vs screw thread
Crimp caps give the most consistent seal and the lowest evaporation, but they need a crimper and a consistent crimp height. Screw caps are faster to use and re-openable, but the seal depends on the cap torque and the thread quality.
Crimp dimensions
For a standard 11 mm crimp finish on a 12 x 32 mm vial, the target crimp height is typically around 5.5 to 6.0 mm measured from the vial base to the top of the crimped cap, and the crimp should be even around the circumference. An uneven crimp leaks. A crimp that is too tight cracks the neck. Check your crimper against a go/no-go gauge and re-check it every few hundred vials.
Screw cap torque
For 9 mm screw-thread vials, I aim for a consistent hand-tight plus a quarter turn using a torque-limited driver set to roughly 0.6 to 0.9 N·m. Over-torque deforms the septum and causes coring or a poor reseal; under-torque allows evaporation. If you are running a validated method, document the torque setting and the cap lot, because both affect the seal.
GPI and ISO references
Thread finishes follow the Glass Packaging Institute (GPI) conventions, and dimensional standards for laboratory glassware sit under ISO. When you specify a 9 mm screw thread or an 11 mm crimp, you are invoking a defined finish. Ask for the GPI/ISO reference on the datasheet so you can verify interchangeability with your existing caps and crimpers. Agilent’s consumables documentation and Thermo Fisher’s sample handling pages both publish dimensional compatibility tables that are worth bookmarking.
A selection checklist with concrete numbers
This is the table I actually use when a new method lands on my desk. Copy it, fill it in, and make the buyer sign it.
- Autosampler compatibility: confirm vial body (12 x 32 mm standard), neck finish (11 mm crimp or 9 mm screw), and tray height. Mismatch causes gripper errors.
- Sample volume: usable volume 1.5 mL in a 2 mL vial; use a 150 or 250 µL insert if you have less than 400 µL.
- Glass class: Type I borosilicate for aqueous and acidic samples; amber for light-sensitive analytes below 500 nm.
- Inertness: silanized glass for proteins, peptides, and basic amines; verify shelf life.
- Seal: silicone/PTFE septum, PTFE facing the sample; pre-slit only for single-use high-throughput.
- Puncture budget: plan for 3 to 10 punctures per septum; replace vials for re-injection sequences.
- Torque/crimp: 0.6 to 0.9 N·m for 9 mm screw caps; 5.5 to 6.0 mm crimp height for 11 mm crimp.
- Temperature: standard vials rated to about 60 °C in the autosampler; use dedicated high-temp vials if your tray runs hotter.
- Documentation: hydrolytic class, GPI/ISO finish, and lot traceability in writing.
Operational precautions that save runs
Selection is half the job. Handling is the other half, and it is where most of the avoidable failures live.
Fill level and headspace
Do not fill above about 75 percent of the vial body. Overfilling pushes liquid into the septum and promotes wicking and contamination. Underfilling (below about 30 percent) increases headspace and evaporation drift. Aim for the middle and be consistent across the whole sequence.
Temperature and volatility
Autosampler trays run at ambient or chilled. If your tray is chilled to 4 to 10 °C, condensation on the septum is a real risk when the vial is removed, and that water can enter the injection. If your analytes are volatile, keep the tray chilled and cap tightly. If they are viscous, a warm tray helps pipetting but accelerates evaporation. There is no universal setting; pick one and document it.
Particle control
Filter samples before they go in the vial, not after. A 0.22 or 0.45 µm filter is standard. Glass particles from a chipped neck or a cored septum will reach the needle and the column. Inspect vials under a light before loading, and reject any with chips at the neck or visible glass dust.
Light and adsorption
Amber glass for light-sensitive work. For adsorptive analytes, silanized glass and a short dwell time in the tray. I have seen a peptide lose 20 percent of its response after sitting in a bare glass vial for 6 hours. The fix was a deactivated vial and a shorter queue, not a new column.
Troubleshooting checklist
When a run goes wrong and the column is not the obvious suspect, work through the vial first. It is faster to rule out than the instrument.
- Ghost peaks or rising baseline: check septum orientation (PTFE to sample), septum extractables, and cap lot. Swap to a known-good septum and re-run.
- Peak area drift across a sequence: evaporation. Check fill level, headspace, cap torque or crimp height, and tray temperature.
- Intermittent autosampler errors: vial height, cap seating, or a cored septum. Check gripper alignment and vial body dimensions.
- Particles or a blocked needle: coring or a chipped neck. Inspect the septum and the vial rim; replace the needle and the lot.
- Low recovery of a protein or basic drug: adsorption to bare glass. Switch to silanized vials and shorten tray dwell time.
- Leaks after transport: crimp height out of spec or under-torqued screw caps. Re-verify with a go/no-go gauge and a torque driver.
If two or more of these appear in the same run, stop and audit the whole vial lot rather than chasing individual symptoms. A bad lot shows up as a cluster, not a single event.
Where to buy, and what to ask
The market splits into instrument-vendor consumables, specialist vial manufacturers, and general lab distributors. All three can work. What separates them is documentation and lot consistency, not brand.
For a single source of HPLC vials with published dimensions and glass class, I keep HPLC vial specifications on file as a reference point when comparing quotes. For the broader consumables basket (filters, tubing, caps, septa), chromatography consumables is where I check cross-compatibility. When the same method needs storage vials or larger-volume containers, lab vials covers the non-analytical side without a separate qualification. And for buyers who want a manufacturer with published glass and septum specs, the Aijiren brand pages are a useful benchmark against the instrument-vendor pricing.
Whoever you buy from, ask four questions before the first order: What is the hydrolytic class? What is the GPI/ISO finish? What is the septum material and orientation? What is the lot traceability? A supplier who answers all four in writing is a supplier you can qualify. One who answers two is a risk you are taking on yourself.
My recommendation
For a general HPLC workflow, standardize on 2 mL, 12 x 32 mm, Type I borosilicate, wide-mouth, 9 mm screw thread with a silicone/PTFE septum (PTFE to sample), and a torque driver set to 0.6 to 0.9 N·m. Use amber glass for light-sensitive analytes and silanized glass for proteins, peptides, and basic amines. Use 150 or 250 µL inserts when volume is tight, with feet-bottomed designs and a verified needle depth. Keep a crimp option in reserve for methods that demand the lowest evaporation, and check crimp height at 5.5 to 6.0 mm with a go/no-go gauge. Budget for 3 to 10 punctures per septum and replace vials for re-injection sequences rather than re-puncturing a tired seal.
That combination will not be the cheapest per unit. It will be the cheapest per valid injection, which is the number that actually shows up in your lab’s cost per sample. The vial is a small line item that decides whether the rest of the method is trustworthy. Treat it that way, write the specification down, and make it part of the method file so the next buyer does not have to relearn what you already know.
References & further reading
Related resources from our lab consumables network:
- Hplc Vial at vialforhplc.com
- Chromatography Consumables at chromatographyconsumables.com
- Lab Vials at labvials.com
- Aijiren Brand at aijirenvials.com
External references and standards: